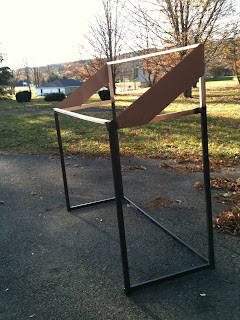
To achieve this look isn't difficult...if you learn from my mistakes!
(Warning: If you have a rocky relationship, I don't suggest you build this with your significant other!....just saying...)
We chose this design because the location for Maddy's party was already going to have tables so it wasn't necessary to also construct a base. While it would have been cute it would have cost a lot more money, taken a lot more time, and would have been much more difficult to transport.
Step One:
You need to decide how big you would like your awning to be. Find out the measurements for the width and length of your table and cut your pieces accordingly. We found we somehow overshot our measurements (Mistake #1. Once we got to the location that day we had to place the awning on a longer table. The extra space was helpful in the end, so it all worked out.
We purchased our lumber at Lowe's. We thought for cost we could get away with very inexpensive 1x2"s. The problem with this was the wood was not strong enough to easily screw or nail together. It kept splitting...and splitting...and splitting. (Mistake #2) Buy higher quality wood or at least wood with a larger diameter. We persevered, but it would have been so much easier. I used duck tape to further secure the joints. At the end of the day, we intended to only use this awning for one day and it only needed to be strong enough to sit on a table and hold fabric!
When measuring how tall your awning needs to be, remember that it will be sitting on a table. Therefore, don't think it looks great based on how it sits on the ground! (Mistake #3...don't estimate what you think the height of the table would be) Our awning ended up being pretty high! No matter what you decide. Ensure the back posts are higher than the front for a sloped look to your awning. We also added the cardboard sides to support the fabric and create an edge once draped.
Spray paint does wonders and is quicker than painting with a brush! We used a flat brown. One can was enough. Remember you really only need to paint what WON'T be covered with fabric.
Step Two:
I bought a gazillion yards of fabric in two designs that I thought coordinated well. I had too much, but was glad to have extra for other design elements of the party (IE. DIY Flag banner around high chair).
We cut our fabric to size, and began using the staple gun to secure it. To get the sides perfect and to avoid any sewing...we made a corner like we would if wrapping a present then stapled. This worked perfectly!
Step Three:
We then added a strip of the coordinating fabric around the sides and front. We stapled to the front beam across the top and allowed the bottom to free flow.
Step Four:
We then stapled on a glitter ribbon trim to hide our seam and other staples. Because we only needed one staple every foot or two it wasn't really noticeable! You could also use a hot glue gun for this part instead.
Finishing the Look:

We found inexpensive hanging butterfly/flower garlands at a Hobby Lobby and hung them for added decor. You could always add additional fabrics for a closed in look if you desired! We found an old box and draped it with a paper table cloth to feature the cake and a few floral centerpieces. We also found inexpensive pink polka dot pop-up boxes and filled them with different crushed candies/treats to add to the ice cream!
We ended up loving the "one day" awning so much that we transformed it into a little princess playhouse! Using a basic slip knot I attached tulle to the sides and hung the garland along with it. Now Maddy has a little house to play in. After the holidays, I think I will add draping fabric to the front and jazz it up a little more!


No comments:
Post a Comment